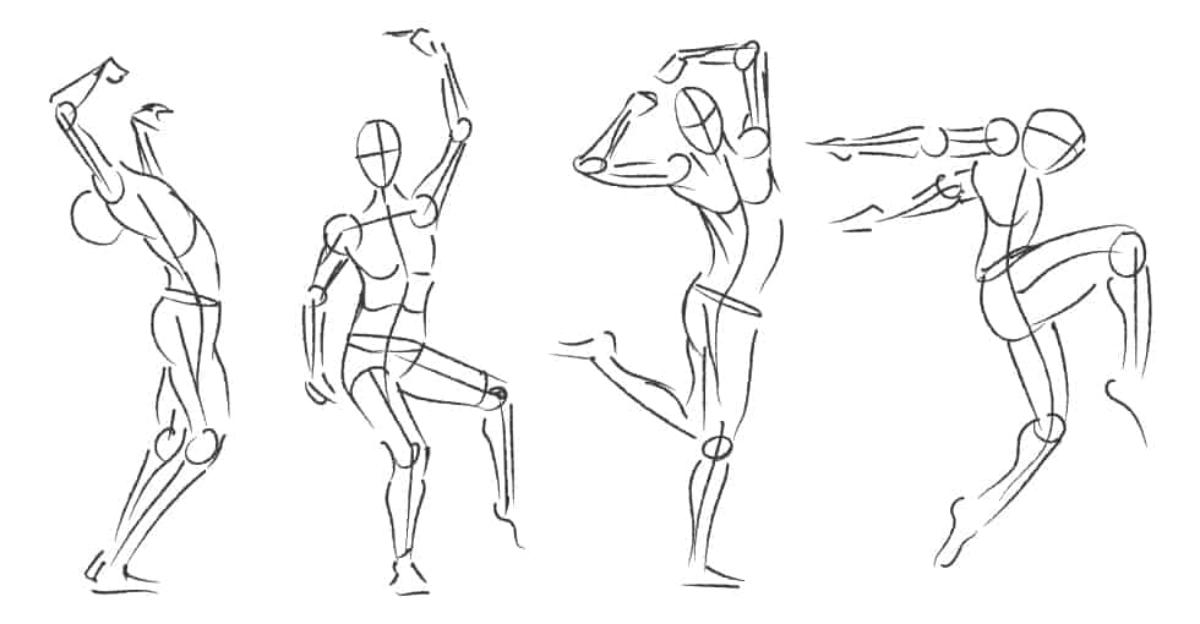
Gesture drawing is the study and sketch of the human figure in motion and can be taught in a few simple steps, outlined below:
1. Start by working from a photograph
Choose a photograph that shows movement, like an athlete, a child running, or someone diving into a pool. Discuss the action—what is happening with the subject’s body? What will happen next? Where is the subject’s weight placed? Where will it be when the action is complete? That shift is what you’re trying to capture.
An understanding of the human body is crucial to gesture drawing, so make sure your students have had ample exposure to photographs of the human body, manikins, and even sessions with live models.
2. Begin with simple stick figure sketches
Copy the photo to rough outlines from shoulder to shoulder, hip to hip, top of the spine to bottom, and an oval for the head.
3. Create an Action Line
Capture the movement by creating an action line or line of action. Roughly sketch a line beginning at the body part bearing the subject’s weight in the photo and running through the hips, spine, and shoulder. Then add another line from the other shoulder to the other foot.
4. Sketch small circles at joints
Sketch small circles in each place the body bends to capture the joints, with the hip circles slightly larger than the rest. Add another large circle for the waist. Revisit your sketch lines and curve them into each joint to convey motion.
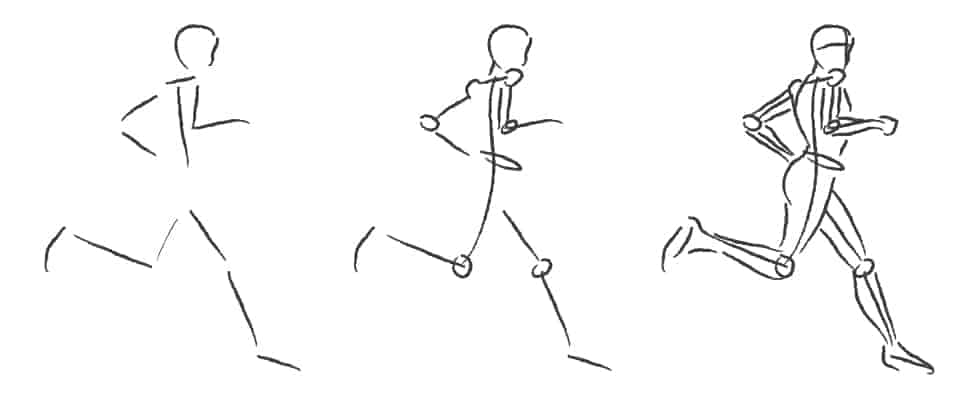
5. Complete the sketch and review
Now you’ve got a rough sketch of the subject in movement and can begin to flesh it out based on your human figure drawing knowledge. Remind your students of the points below:
- The legs are roughly half the length of the body
- Thighs are wider than calves
- Arms extended down reach the upper thigh, with elbows near the waist and wrists near the hips—they are almost as long as the legs
Remember, a gesture drawing is not meant to be a detailed study. It’s meant to be a rough capture of a moment in time.
Whether you’re teaching gesture drawing as an end result or as a step toward mastery of the human body, remember that a gesture drawing is a quick sketch and should be completed in short bursts of time. Five minutes is plenty for each sketch, so be sure you have enough source photos to keep your students working. If using a live model, have them assume a new pose every minute, as active gesture poses can be hard to hold longer than that!
Have you introduced gesture drawing to any of your classes? Are there any tips you would add for art teachers trying this for the first time? Let us know in the comments below!




love the drawing!