Shop Subscribe

  • Facebook
  • Instagram
  • LinkedIn
  • Pinterest
  • Twitter
  • YouTube

Schoolyard Blog | Teacher Resources | School Specialty

Tips and trending topics for the teacher who's always learning

schoolyard-logo
  • Education Essentials
  • Inspiration & Planning
  • Learning Spaces
  • Podcasts
  • Topics
  • Search
  • < Previous post
    Next post >

    Arts & Crafts

    How to Make Slime Keeper Globes

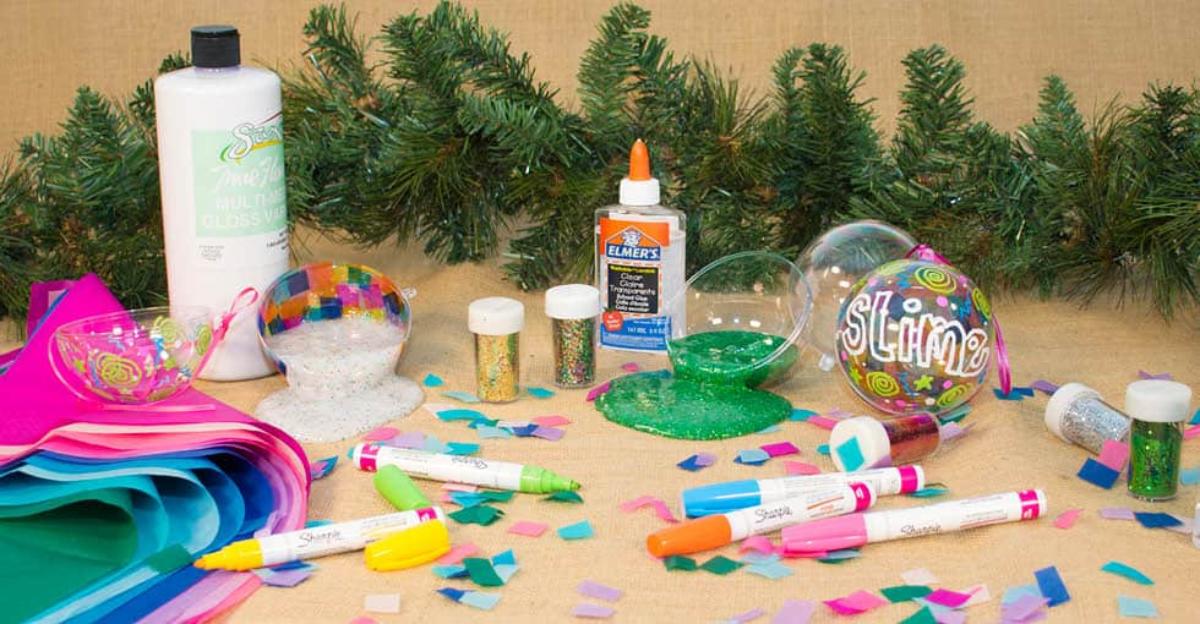
    Everyone is making and playing with Slime. This project shows you how to make a container to store Slime in or give as a gift. Our acrylic globes make a great storage container for Slime. The outside surface of the acrylic globes allows you to use your creativity to make a one of a kind container. Below is a list of the products used to make the two featured Slime Keepers. Globe One is covered with colored tissue paper creating a mosaic look. Globe Two is uniquely cover with original art using oil based markers making the art permanent.

    Globe One

    Product List:

    • Acrylic Globe
    • Sax True Flow Multi Media Varnish, Gloss
    • Kolorfast Tissue Assortment
    • Assorted Brushes, scissors and ribbon

    Instructions:

    Separate globe creating two halves. Cut tissue into small squares.  Attach to clean outer globe surface using STF Multi Media Varnish. Always use a dry brush. Do not use water until clean up. When applying the squares make sure not to cover the globes seam or hanger tabs. Once completely covered allow to dry and cover with a second coat of STF Multi Media Varnish using a dry brush to apply. Ribbons can be attached to the globe hanger tab if desired.

    Globe Two

    Product List:

    • Acrylic Globe
    • Sharpie Oil Based Markers, Fashion Set
    • Ribbon and charms

    Instructions:

    Draw your idea for an all over design on paper to determine how it will fit on the globe. Keep in mind how the design will fit onto the two halves. Separate the globe into two halves. Using the oil based markers draw you design onto each half of the globe. Allow to dry. You can attach decorative ribbon and charms if desired.

    Directions for Slime

    Tagged With: Craft Projects

    Leave a Reply Cancel reply

    Your email address will not be published. Required fields are marked *

    This site uses Akismet to reduce spam. Learn how your comment data is processed.

    Recommended

    Spark Student Creativity with These Fun Writing Prompts

    Inspiration & Planning

    Spark Student Creativity with These Fun Writing Prompts

    Books to Help Prevent Bullying: Titles for Every Grade Level

    Inspiration & Planning

    Books to Help Prevent Bullying: Titles for Every Grade Level

    Art Lesson Plan: Legendary Sunset Landscapes

    Arts & Crafts

    Art Lesson Plan: Legendary Sunset Landscapes

    The Best Fall Art Projects for Your Class

    Arts & Crafts

    The Best Fall Art Projects for Your Class

    Explore The Schoolyard

    Education Essentials

    Inspiration & Planning

    Learning Spaces


    TopicsShop Subscribe

    Copyright © 2025 School Specialty, LLC. All rights reserved. Privacy Statement · Social Media Statement · Do Not Sell My Personal Information - CA Resident Only

  • CATEGORIES

    • Education Essentials
    • Inspiration & Planning
    • Learning Spaces
  • TOPICS

    • Arts & Crafts
    • Early Childhood
    • Special Needs
    • Physical Education
    • Educational Technology
    • Student Resources
    • Organization & Storage
    • Classroom Management
    • STEAM & STEM
    • 21st Century Learning
    • Reading & Literacy
    • Healthy Students
    • Teacher Life
    • Back to School
    • Celebrations & Seasons
    • Out of School
    • News
    • Math
    • Science
    • Podcasts
    • Topics
    • Shop
    • Subscribe
    • Facebook
    • Instagram
    • LinkedIn
    • Pinterest
    • Twitter
    • YouTube