Laminating is a great way to keep classroom items lasting longer. Whether a school uses a large roll laminator, a smaller machine, or self-sealing laminating pouches or sheets, there are several tips to achieve the best results.
Table of contents
1. Use Correct Heat Settings
Most laminators have a light that comes on or stops blinking when the correct temperature is reached. It’s best to start with a lower heat and work up to a higher level. Items may become cloudy at too low a temperature or wavy at too high a temperature.
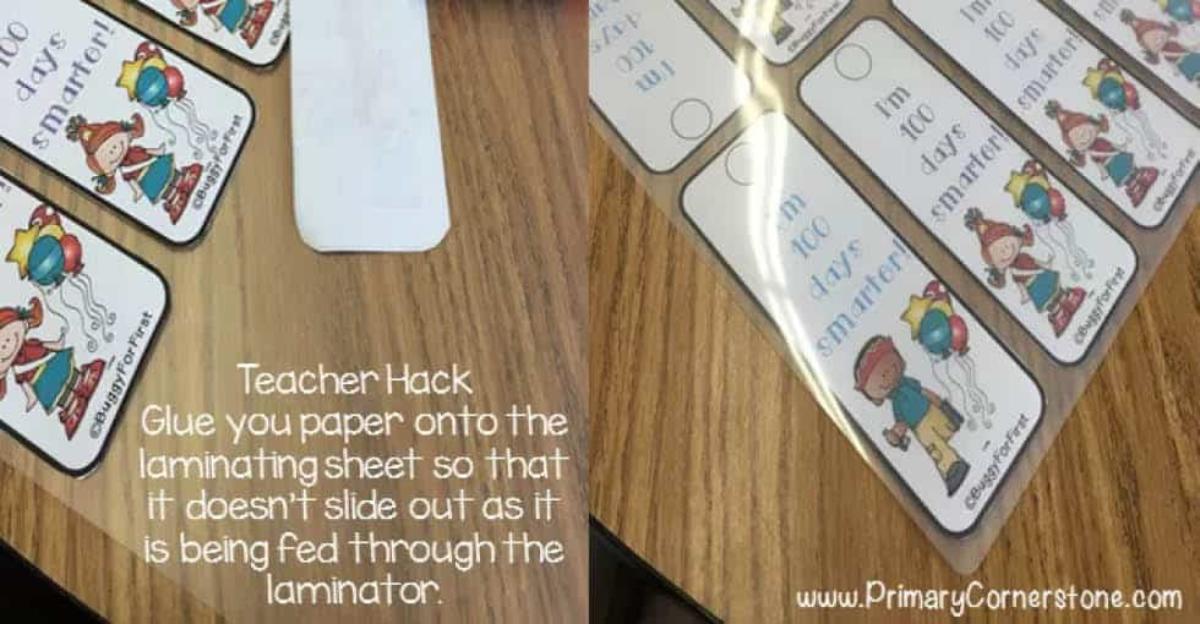
2. Secure Small Pieces
Using just a dab of glue to secure several smaller pieces will keep them from slipping when entering the laminating machine. Glue sticks are easier to use for this purpose since they are solid and don’t run.
3. Trim Empty Spaces
Trimming excess white space on papers before laminating will help provide more space and prevent waste. Sometimes, just trimming an inch or so off everything that needs laminating will allow the items to be placed so fewer films or pouches are needed.
4. Use Both Sides
Laminating items that can be used on both sides saves time and money and ultimately saves us space when storing. Flashcards, math practice sheets, and even puzzles are examples of items that can be used on both sides.
5. Test Run Important Papers
Sometimes items don’t come out exactly as we hope. Items can come out wrinkled if the film isn’t properly fitted in the machine. Bubbling can occur if papers are pushed through too quickly. Conduct a test with paper of a similar size.
Following these simple tips can help solve many of the problems that occur when we’re laminating.


Leave a Reply