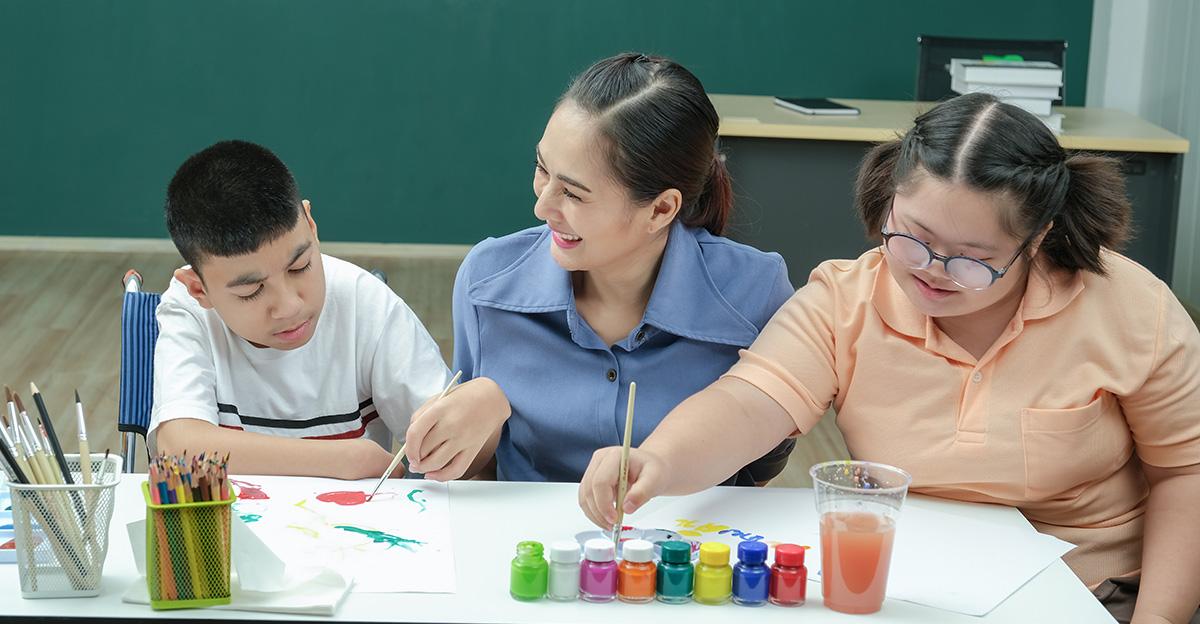
Art is for everyone, and no one knows this better than our art educators! If you have art students with special needs, we’re here with 7 tips to help you to conduct a smooth inclusion process and ensure everyone in your art room can experience the beauty of artistic expression.
Table of contents
7 Ways to Include Students with Special Needs in Art Class
1. Use the Student’s IEP
If the student is in special education, they will have an Individualized Educational Program (IEP) that will identify the student’s present level of performance. This includes cognitive abilities, strengths and weaknesses, goals and objectives, and any assistive technology (including adaptive equipment) that is recommended for the child to be successful. It may also mention appropriate related services, including Occupational, Physical, or Speech Therapy.
If possible, review this document before school starts and collaborate with the Special Education (SPED) team (an assigned SPED Teacher or Related Services mentioned above) to help problem-solve any positioning, communication, sensory-motor, or cognitive/behavioral needs.
2. Ask Parents for Helpful Info
Parents are often the best advocates for their children, so if it’s an option, take some time to get to know the family at the “Meet the Teacher” events many schools schedule just before the first day of school. Any particular sensory needs or preferences would be helpful during this discovery period. Are they bothered by lights or sounds? Do they get overwhelmed easily? What are their favorite ways to calm down or cope?
3. Make Your Classroom More Accessible
Consider the ease of accessibility of your art room layout. Do the tables have enough space between them to accommodate a wheelchair (minimum 36 inches wide), or is there at least one access row that would have this allotted space? For children with mobility issues (e.g., balance issues, walk with braces and/or crutches) be mindful of possible trip hazards such as a throw rug, protruding chair or stool legs, extension cords, etc. This is good safety practice for all!
4. Change Up the Lighting
Overhead lighting, especially fluorescent, may cause issues with glare and overstimulation. Turning them off is the first option, but if that’s not possible, you can use light shades to dim them. You may also check whether dimmer-switch installation or free-standing floor lighting is an option.
5. Reduce Visual Stimulation
Reduce visual stimulation in the classroom. Keep supplies behind closed cabinets, or use simple curtains or fabric panels to cover shelves. Limit the amount of artwork on the walls or suspended from the ceiling.
6. Consider Adding Adapted Seating
Make sure the workspace is stable and accessible. Use adapted desks and seating as needed. To keep items in place, use a non-skid pad under the student’s work surface.
7. Use Images to Supplement Instruction
A picture IS worth a thousand words! Use simple pictures or icons, along with step-by-step directions, to supplement your art classroom rules. Make sure any non-verbal child can communicate basic needs.
Art is Important for All Students
No matter the student’s ability, research shows that the Arts make a difference in the development of all students. As an art educator, you are a vital part of this process!


Leave a Reply