If you’re looking to shake things up in your art class or for a fun new project to try on your own, look no further than batik. This resist process is a fairly simple, age-old, Japanese tradition resulting in beautiful and unique hand-dyed fabrics.
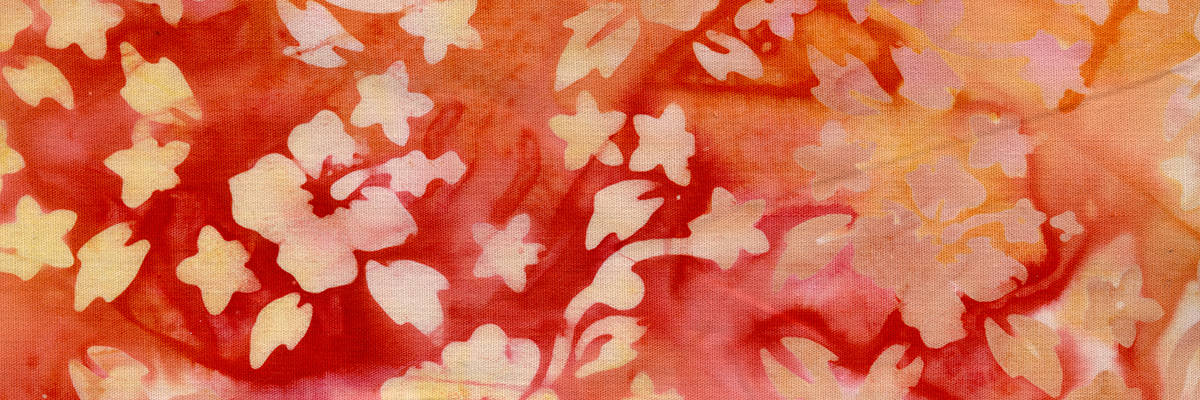
Batik involves applying wax to cotton, silk, and other natural fibers before dying. The wax resists most of the dye but crackles in places, allowing thin lines of color to penetrate. Although fabric can be waxed and re-waxed, double and even triple-dipped with amazing, multi-colored results, single-tub dying is the simplest introduction to batik. So that’s where we’ll begin!
Getting Started with Batik
1. Wash the natural fiber fabric you plan on dying to remove all impurities.
2. Depending on the color you would like beneath your wax resist, you may want to tub dye your entire fabric before you begin.
3. Melt your batik wax slowly, over low heat, using a melting pot, double boiler, or electric pot/pan. Don’t heat the wax over 240 degrees, as it could catch fire. Students may find it easier to work with liquid wax in a bottle or batik waxmelter applicator pen.
4. Lay your dry fabric on a piece of cardboard or newspaper, or stretch it across a frame or embroidery hoop if you have one.
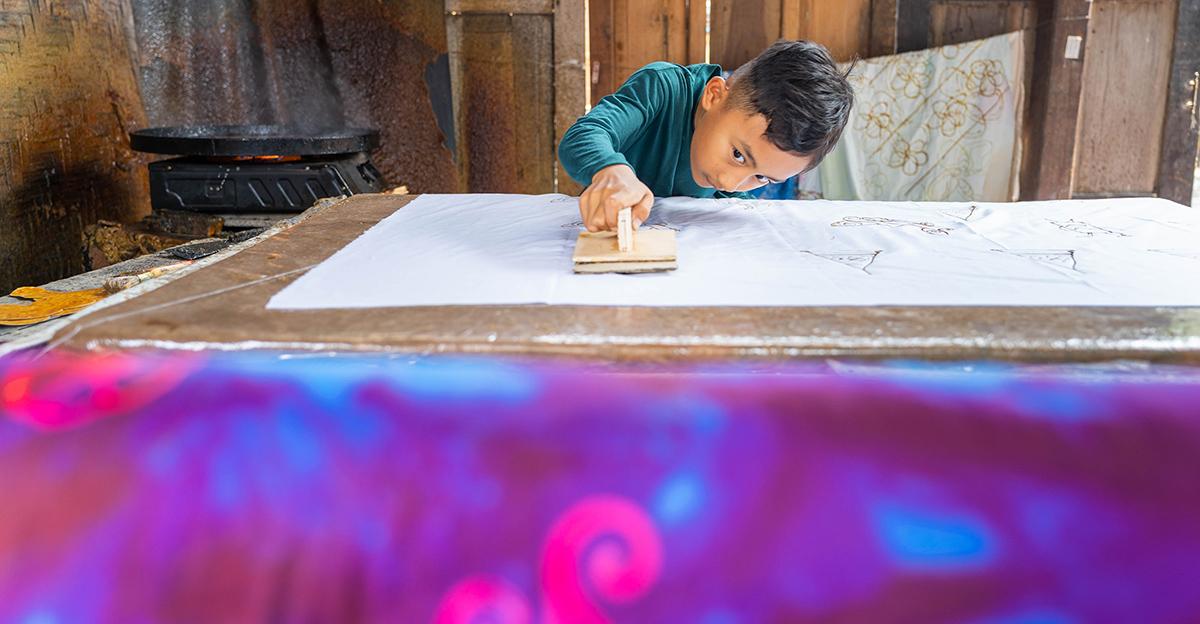
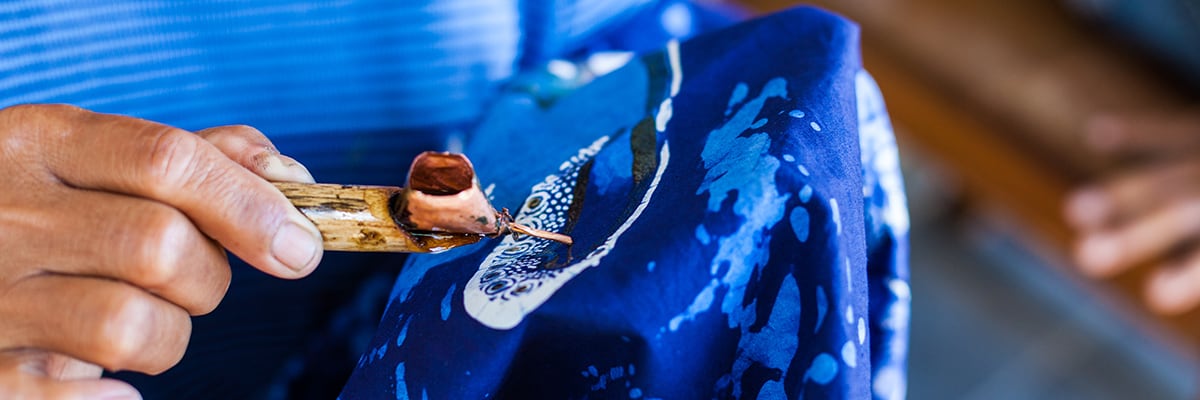
5. If you’re working with liquid wax in a bottle, squeeze the bottle onto your fabric to release the wax in your desired pattern. Otherwise, use a paintbrush to apply the melted wax to the fabric in your desired design. Stripes, polka dots, and basic shapes are an easy way to start. More advanced batik artists use specific tools, including spouted wax applicators called tjanting tools and metal stamps, to create more detailed designs.
You can use anything you’ve got lying around—potato masher, butter brush, even vegetable stamps. The wax should penetrate the fabric, going all the way through to the other side. If it’s just sitting on top of the fabric, it’s not hot enough.
6. Prepare your dye. Follow the instructions on the package, which usually involve dissolving the dye, adding non-iodized salt (1-1/2 lbs for each 1/2 lb of fabric), and stirring.
7. Dunk your wax-covered fabric into the dye tub, gently stirring until your fabric is the desired color.
8. Dissolve the indicated amount of sodium carbonate in warm water and pour a little at a time into the dye tub (not directly onto the fabric) for about 15 minutes to set the dye. Don’t leave the fabric in the sodium carbonate dye tub for more than 30 minutes, or the dye will begin to dissolve the wax.
9. Rinse your fabric in lukewarm water.
10. Place the fabric between two layers of newspaper and use an iron to melt the wax off the fabric. This is a time-consuming step and will take many ironings to remove every bit of wax. Boiling the fabric in detergent is another option (the wax rises to the top of the pot and can be carefully scooped away), but it may not be feasible in your art room.
11. Wash and dry your beautiful batik fabric!
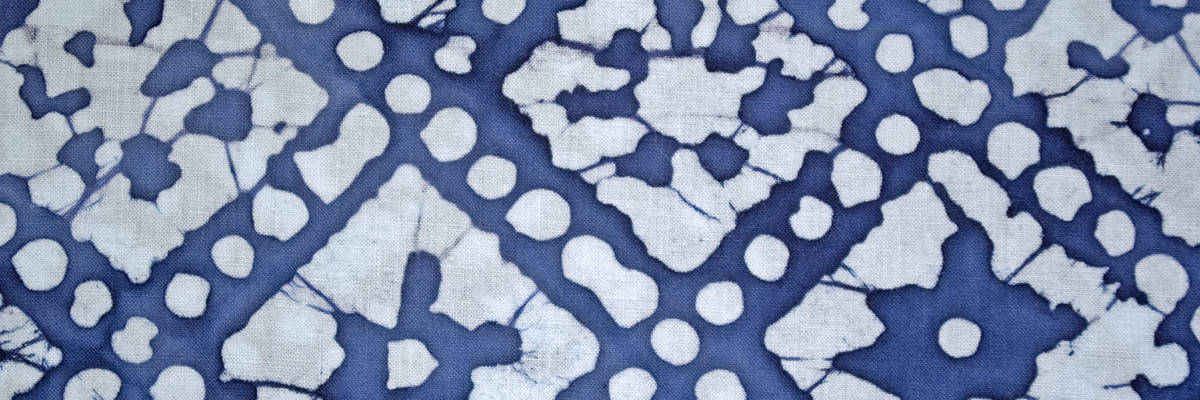
Once you’ve got the process down, you can experiment with double and triple-dyeing your fabrics and reapplying your wax for beautiful, overlapping colors and designs. Batik kits are also available, enabling you to dye everything from pre-sewn totes and aprons to Japanese wind socks. You can even apply batik to one of our art lesson plans to make something truly special!
Do you batik? Have you tried the process in the classroom? Share your stories below.


Leave a Reply