Shop Subscribe

  • Facebook
  • Instagram
  • LinkedIn
  • Pinterest
  • Twitter
  • YouTube

Schoolyard Blog | Teacher Resources | School Specialty

Classroom must haves for teachers plus essential teacher supplies, lesson plans and activities.

schoolyard-logo
  • Education Essentials
  • Inspiration & Planning
  • Learning Spaces
  • Topics
  • Search
  • < Previous post
    Next post >
    Mono Printing 101

    Arts & Crafts
    • Sep 27, 2017 • Last Modified: Apr 6, 2018

    Mono Printing 101

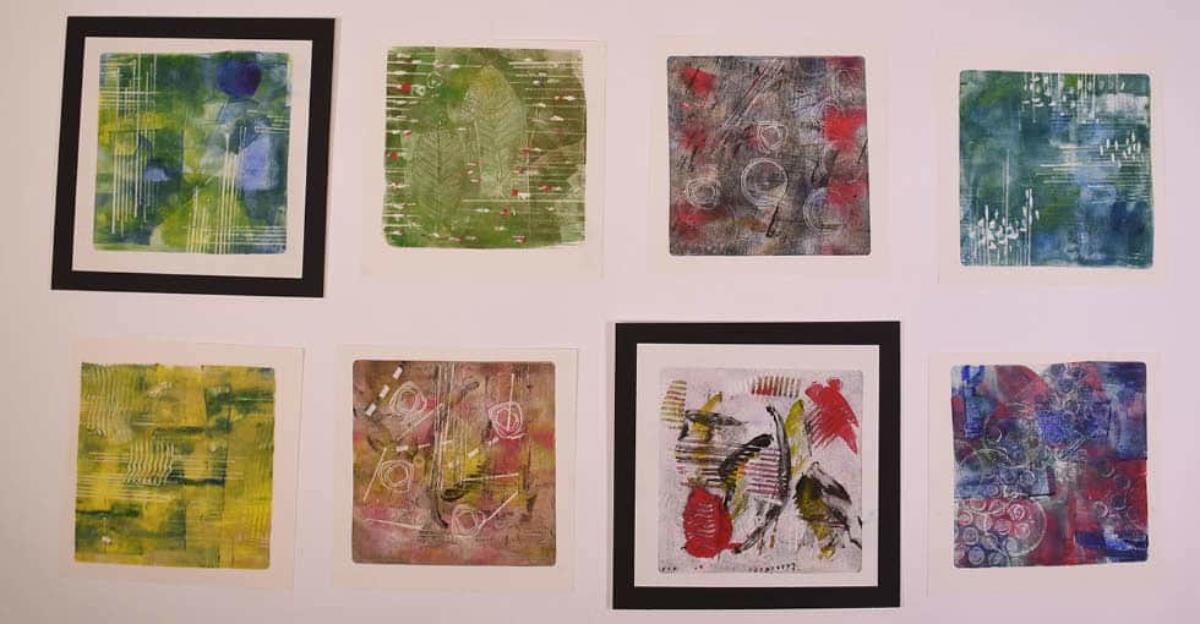
    Unlike traditional printmaking processes that allow the printer to make multiple, identical prints from a single original, the process of mono printing creates one unique print from a master.

    Basically, an artist paints a scene or design on a master, which could be made of vinyl, acetate, sealed cardboard, Styrofoam, or even glass, then presses a sheet of paper to the master, transferring the image and creating a one-of-a-kind print that can never be exactly duplicated.

    Artists creating mono prints can work in the positive, adding ink to a blank master to create an image, or in the negative, covering the master in ink and wiping ink away to create an image. Either way, creating a mono print master requires both drawing and painting skills.

    Although many materials can serve as a master, the gel pad is one of the easiest ways to get started. The below provides instruction for creating a mono print using a gel pad, but the steps will be the same no matter your master.

    To get started:

    1. Gather your tools – you’ll need your gel pad (these are available in a variety of sizes and quantities), inks, wedges, brayers, paper, and any other tools you’ll be using to create your image.
    2. Use a paintbrush or brayer apply your paint or ink to create a positive design. You can also create a negative design by  ink onto your entire plate, then using a rag or cotton swab to remove ink in a desired pattern. You can also try placing a sheet of paper over the paint-covered pad and drawing an image onto the paper. When the paper is removed, the designed area will lift off the pad as well. You can create unique textures and patterns with all kinds of objects – simply press them into the paint, then onto the gel pad.
    3. When your design is complete, press a sheet of paper to the master and run your hand back and forth over it to ensure a smooth, even transfer. Lift the paper slowly from one corner to reveal your one-of-a-kind print.
    4. Try creating a layered print by designing another master, placing the same sheet you just printed (make sure it’s dry first) on top of the gel pad, and transferring the second image on top.
    5. Clean your pad with baby wipes or soap and water and gently pat it dry. Store until you’re ready to print again.

    Have you tried mono printing with your class? Which techniques were most successful? Share your tips and tricks with your fellow teachers below.

    Tagged With: 101 Art Series

    Leave a Reply Cancel reply

    Your email address will not be published. Required fields are marked *

    This site uses Akismet to reduce spam. Learn how your comment data is processed.

    Recommended

    Crayola Partners with School Specialty for Crayola Creativity Week

    News

    Crayola Partners with School Specialty for Crayola Creativity Week

    Block Play: Stacked with STEAM

    STEAM & STEM

    Block Play: Stacked with STEAM

    Four Ideas to Support Family Engagement in the Art Classroom

    Arts & Crafts

    Four Ideas to Support Family Engagement in the Art Classroom

    Extended Learning in Art: Fostering Inspiration Through Everyday Life

    Arts & Crafts

    Extended Learning in Art: Fostering Inspiration Through Everyday Life

    Explore The Schoolyard

    Education Essentials

    Inspiration & Planning

    Learning Spaces


    TopicsShop Subscribe

    Copyright © 2023 School Specialty, LLC. All rights reserved. Privacy Statement · Social Media Statement · Do Not Sell My Personal Information - CA Resident Only

  • CATEGORIES

    • Education Essentials
    • Inspiration & Planning
    • Learning Spaces
  • TOPICS

    • Arts & Crafts
    • Early Childhood
    • Special Needs
    • Physical Education
    • Educational Technology
    • Student Resources
    • Organization & Storage
    • Classroom Management
    • STEAM & STEM
    • 21st Century Learning
    • Reading & Literacy
    • Healthy Students
    • Teacher Life
    • Back to School
    • Celebrations & Seasons
    • Out of School
    • News
    • Math
    • Science
    • Topics
    • Shop
    • Subscribe
    • Facebook
    • Instagram
    • LinkedIn
    • Pinterest
    • Twitter
    • YouTube