Underpainting. You’ve probably heard the term, but what is it, and why should you and your students try it?
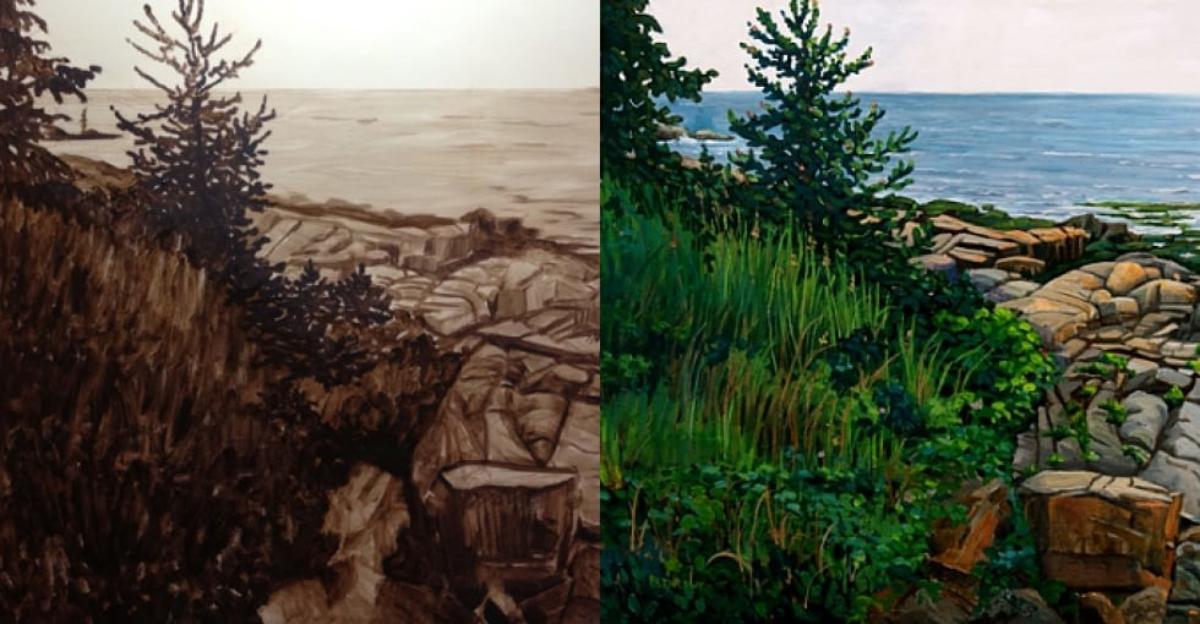
Underpainting is simply the application of a layer of paint to your entire blank canvas. There are several reasons to consider using the technique, one frequently used by the masters of old. It provides a foundation for your next layers of paint, adds color contrast and luminosity, checks your composition and the shape, size, and placement of your elements, and, not least of all, covers that empty white canvas and eases the stress of your first strokes of color. Let’s examine these benefits one at a time.
Washing your canvas in color creates a foundation for the rest of your work. You might choose to apply an even layer of color over your entire canvas or to rough out your scene in a single color, layering darker and lighter in areas of shadow and light. Either way, this first layer of paint will cover much of your paper’s texture, creating a smoother surface for your work.
Applying a specific color to your entire canvas can also add a subtle tone to the finished piece. This affects the layered colors you choose and unifies your work. For example, choosing a cool shade, like blue, for your underpainting layer can give a piece a cold feeling. A reddish base will give the entire finished piece a warm glow. Underpainting with a lighter color can also create that glowing, luminous feeling the classic painters achieved by reflecting the light that travels through the various layers of paint back at the viewer.

And last, a blank canvas can be daunting. Covering the entire piece in a wash of color is an easy way to get past your nerves and get started. Plus, roughing out your scene this way allows you to examine your composition, scale, and the placement of various elements before you really dig in with color.
The actual process of underpainting is fairly simple. There are a few different ways to do it, including:
- Cover your entire canvas in one transparent color.
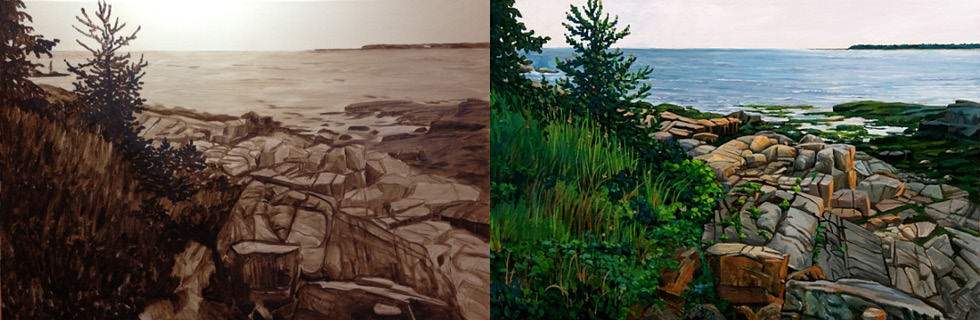
- Layer your single underpainting color to connote the shadowed areas in your piece. The old masters used a process called grisaille, whereby they actually painted their entire scene in their single underpainting color.
- Use chalk on your dry underpainting layer to quickly rough your scene, then wipe it away again.
- Leave some areas of your canvas unpainted—the color you use to cover these white spots will be more vibrant than your other colors, making those areas shine brighter.
- Leave some of your underpainting color uncovered in your final work, allowing the underpainting color to show through.
A high-quality oil or acrylic paint thinned with a bit of turpentine or other thinning medium makes the perfect underpainting consistency. You’ll want to choose your underpainting color carefully, according to your objectives. Light earth tones or other muted tones will provide a natural base and reflect lots of light. Darker colors will affect the tone of your other layered colors and may show through your painting. Consider using a color wheel to help select an underpainting color that’s complementary to the colors of your finished piece.
Have you used underpainting techniques with your students or on your own works? Share your own tips, tricks, and questions with your fellow teachers below!

Leave a Reply